Zion National Park: The Ultimate Guide
Zion National Park is an all time favorite park for me and somewhere I go nearly every year. I think I'm so obsessed with it because it is so unique compared to every other national park and feels like a completely different world. The massive sandstone cliffs, the slot canyons, the hikes — it is unlike anywhere else I've ever been.
This guide covers the best hikes and places to go to in Zion as well as some of the top spots to hit outside of the park in the surrounding towns. I've included a mix of must-see areas (despite being touristy) and some lesser-known hikes that are just as beautiful as the iconic ones.

Angels Landing
Entrances
There are three entrances into Zion National Park. Depending on where you want to go in the park and what you want to see, one may be better for your trip over the other.
The South Entrance

The South Entrance
The South Entrance is by far the most popular entrance of Zion National Park, and the one I use the most whenever I visit. But because of that, is the most crowded. It is located nearly 4 hours away from Salt Lake City and is near the popular Utah town of Springdale, which has a ton of restaurants and hotels.
There is also a large Visitor Center at the South Entrance with bathrooms and a gift shop.
The South Entrance is also the home of the main launching point for the Zion Canyon Shuttle System, which will take you into Zion Canyon, so if you don't have a car, don't worry! You can still easily enjoy the park. In fact, for most of the year, personal vehicles cannot be driven up Zion Canyon which is the road that leads to a lot of the most popular hikes.
During peak season (summer) the line to get into the South Entrance is LONG! And sometimes it gets so packed they'll stop letting cars in altogether (it happened to me in May 2023). If you're visiting the park during peak season and want to ensure you'll get in, I recommend getting to the park first thing in the morning -- like 7AM at the latest!
East Entrance (Zion-Mount Carmel Tunnel)

The Zion-Mount Carmel Tunnel at the East Entrance of Zion National Park
The East Entrance to Zion is about 5 hours away from Salt Lake City and the closest entrance to the town of Mt. Carmel. It is also the closest entrance/exit point if you're trying to visit Kanab, Utah and the Coral Pink Sand Dunes State Park.
Though the East Entrance is a bit less crowded compared to South Entrance, it does get backed up so, once again, I recommend arriving as early as you can to avoid lines.
Note that there is no parking here, and no shuttle launch like there is at the South Entrance.
Kolob Canyons Visitor Center

Kolob Canyons Visitor Center park entrance
Located in the Northwest corner of Zion National Park, the Kolob Canyon is 40 miles north of Zion Canyon (about a 1-hour drive). It is a five-mile scenic drive, and is the least visited area of the park. It cannot be accessed from Zion Canyon, but only from a separate park entrance near Cedar City, Utah.
Though off-the-beaten path, the area is BEAUTIFUL and a great place to visit if you want to avoid crowds. There are plenty of hikes and stunning views to enjoy.
The Kolob Canyons Road is often closed during the winter months or whenever there is snow or ice, so I recommend you check to see if it is open prior to making your plans if you decide you want to access it.
Zion Canyon Shuttle System Information
The Zion Canyon Shuttle System connects the Zion Canyon Visitor Center (located at the South Entrance) to stops on the Zion Canyon Scenic Drive. When the shuttle is running, private vehicles are not allowed to enter Zion Canyon Scenic Drive, meaning you'll need to take the shuttle if you want to experience any of the hikes located along this road -- this is where some of the most iconic hikes in Zion begin, such as Angels Landing and The Narrows bottom-up trailhead.
Important shuttle information:
You do not need a ticket, permit, or reservation to use the shuttle. Simply get in line at the Visitor Center. There is also a large parking lot here so if you have a private vehicle, you can park it.
You do not need to pay to ride the shuttle. It is free!
Shuttles run every few minutes. The first one typically leaves the Visitor Center at 7am (depending on the time of year).
Shuttles take about 45 minutes to drive between the Zion Canyon Visitor Center and the Temple of Sinawava. This means a round trip takes about an hour and a half.
I always recommend getting into the park first thing in the morning, but especially if you're planning to utilize the shuttle. The line to get on it can sometimes be extremely long, and finding a parking spot for your private vehicle in the lot can get tricky as the day goes on. Definitely get to the park 30-minutes prior to the first shuttle departure to ensure a smooth morning!

Waiting in line for the Zion Canyon Shuttle
Hikes
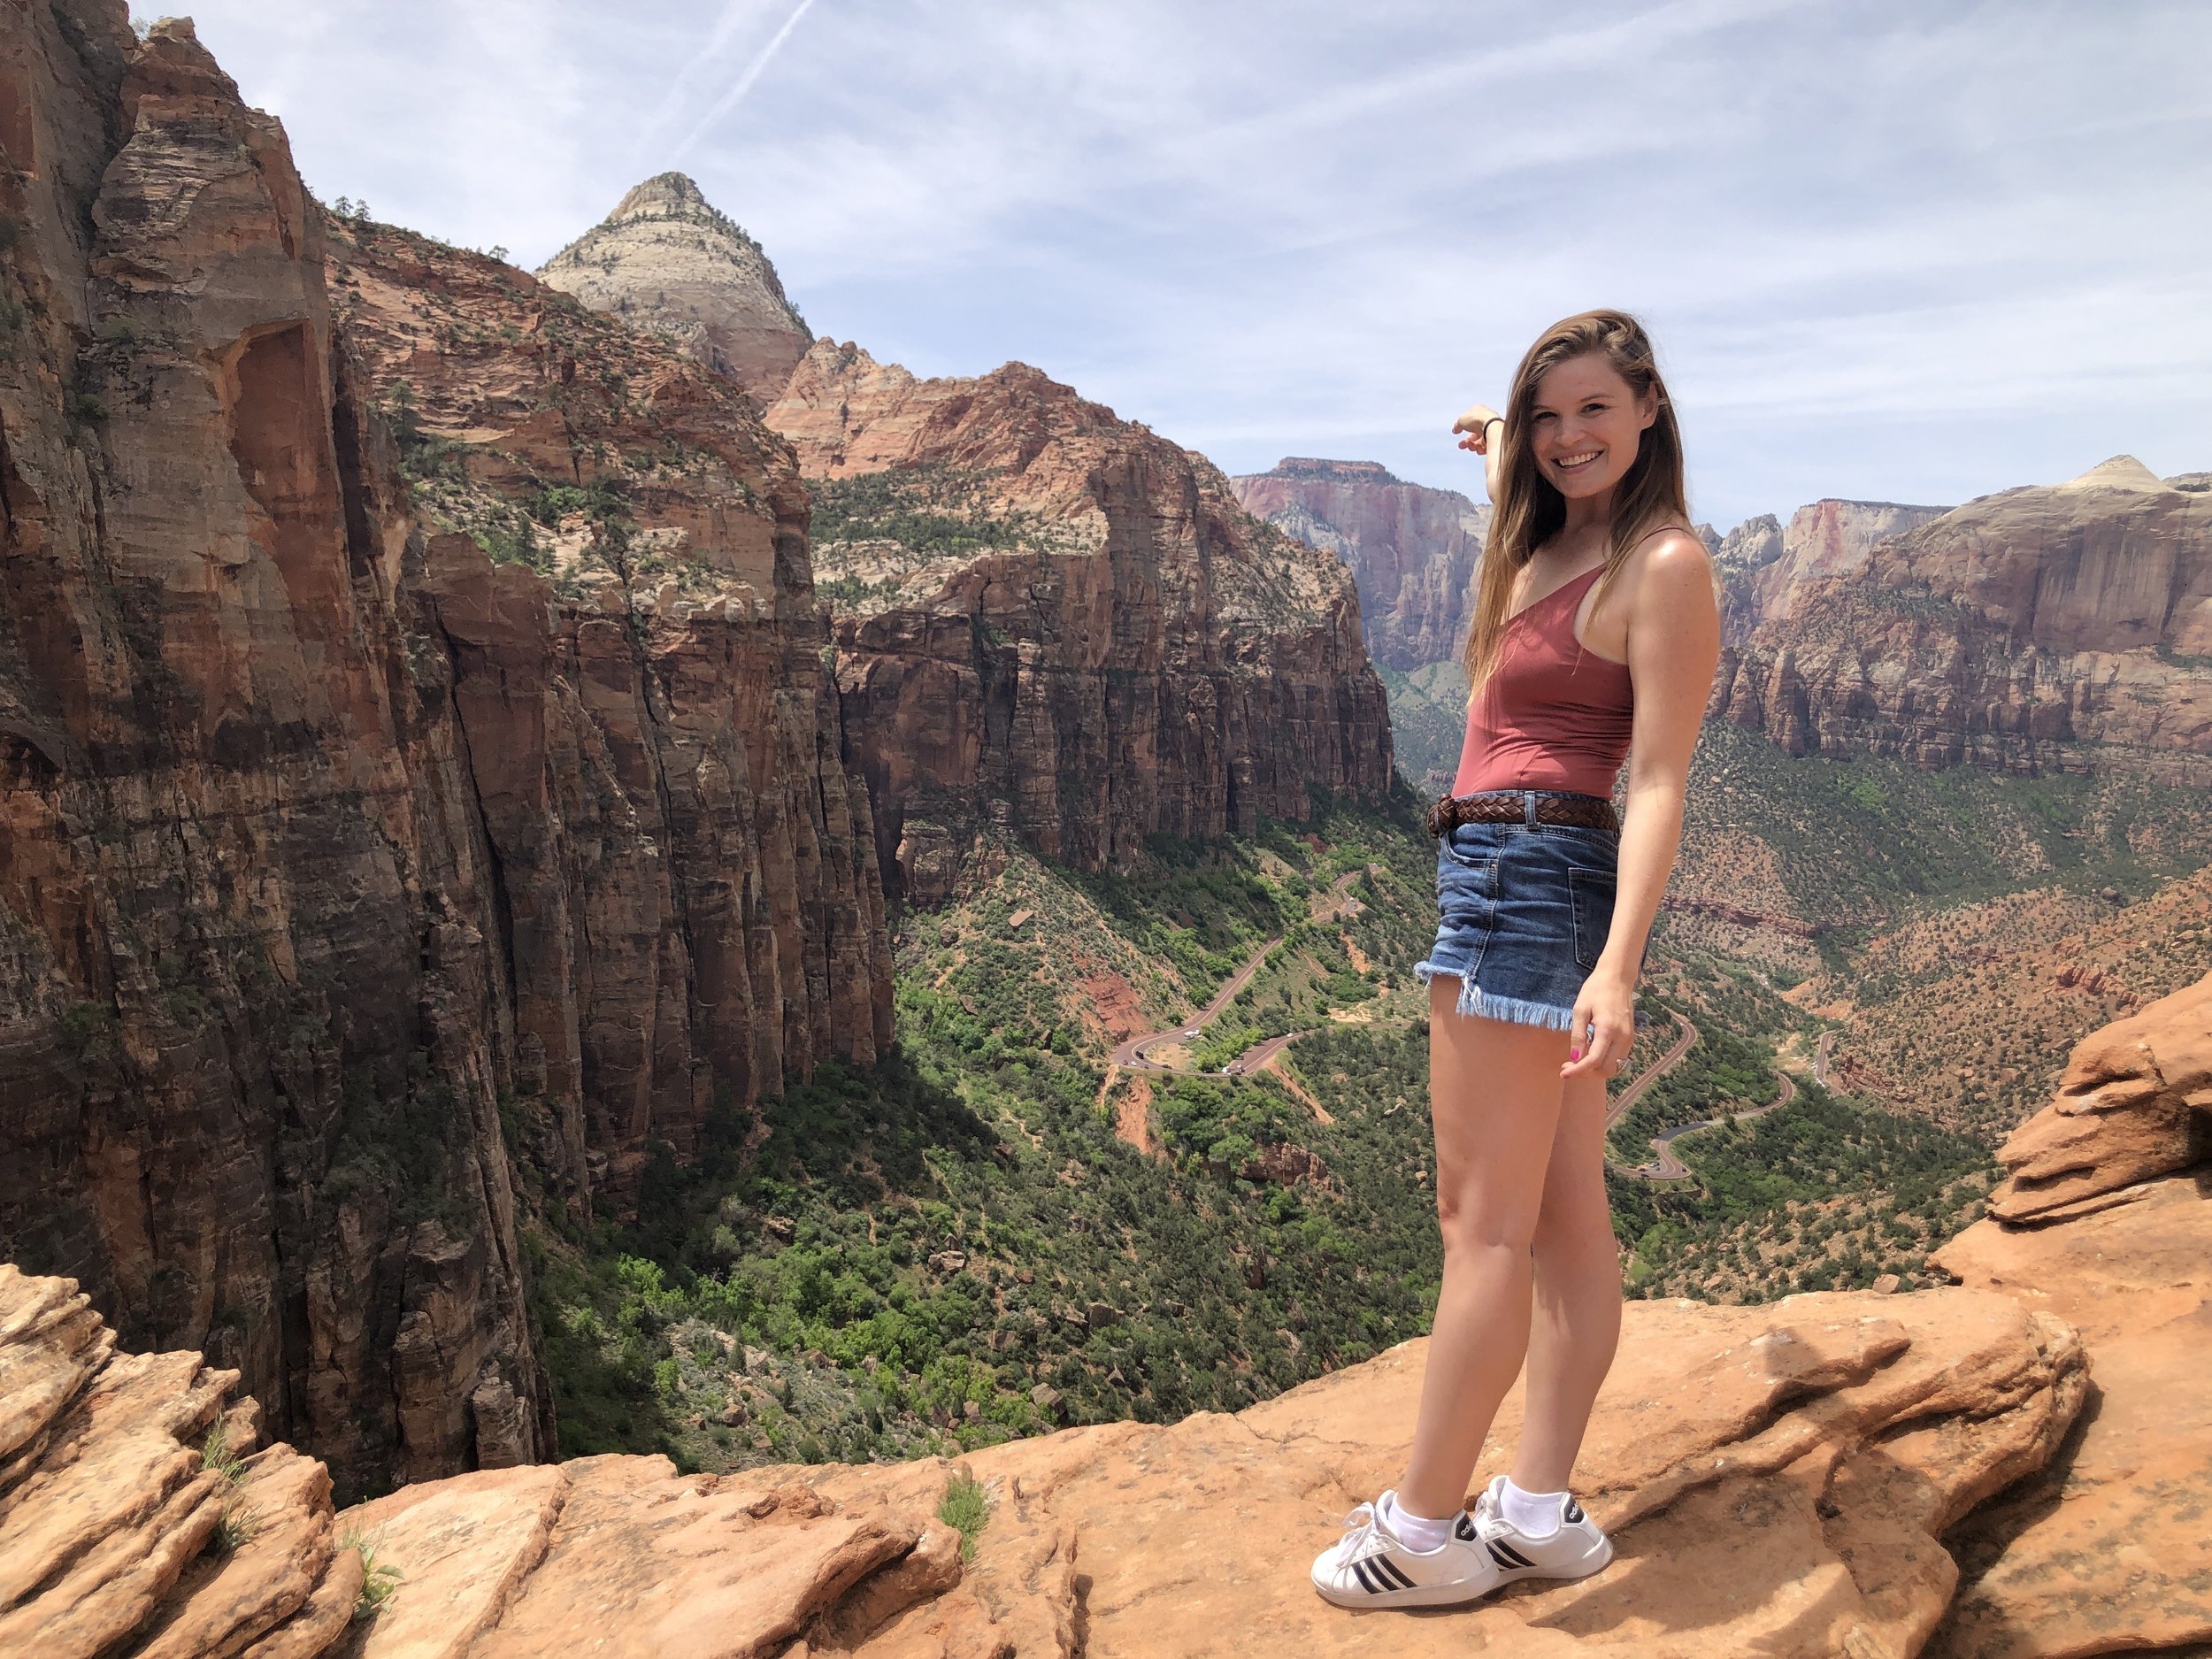
Angels Landing
Angels Landing is one of the most iconic hikes in the world, and also one of the most dangerous. But with proper hiking endurance and equipment, you'll be able to conquer this hike safely! And feel extremely rewarded for doing so. I've hiked Angels Landing 5 times in my life and it is one of my all-time favorite hikes. Below are my best tips:

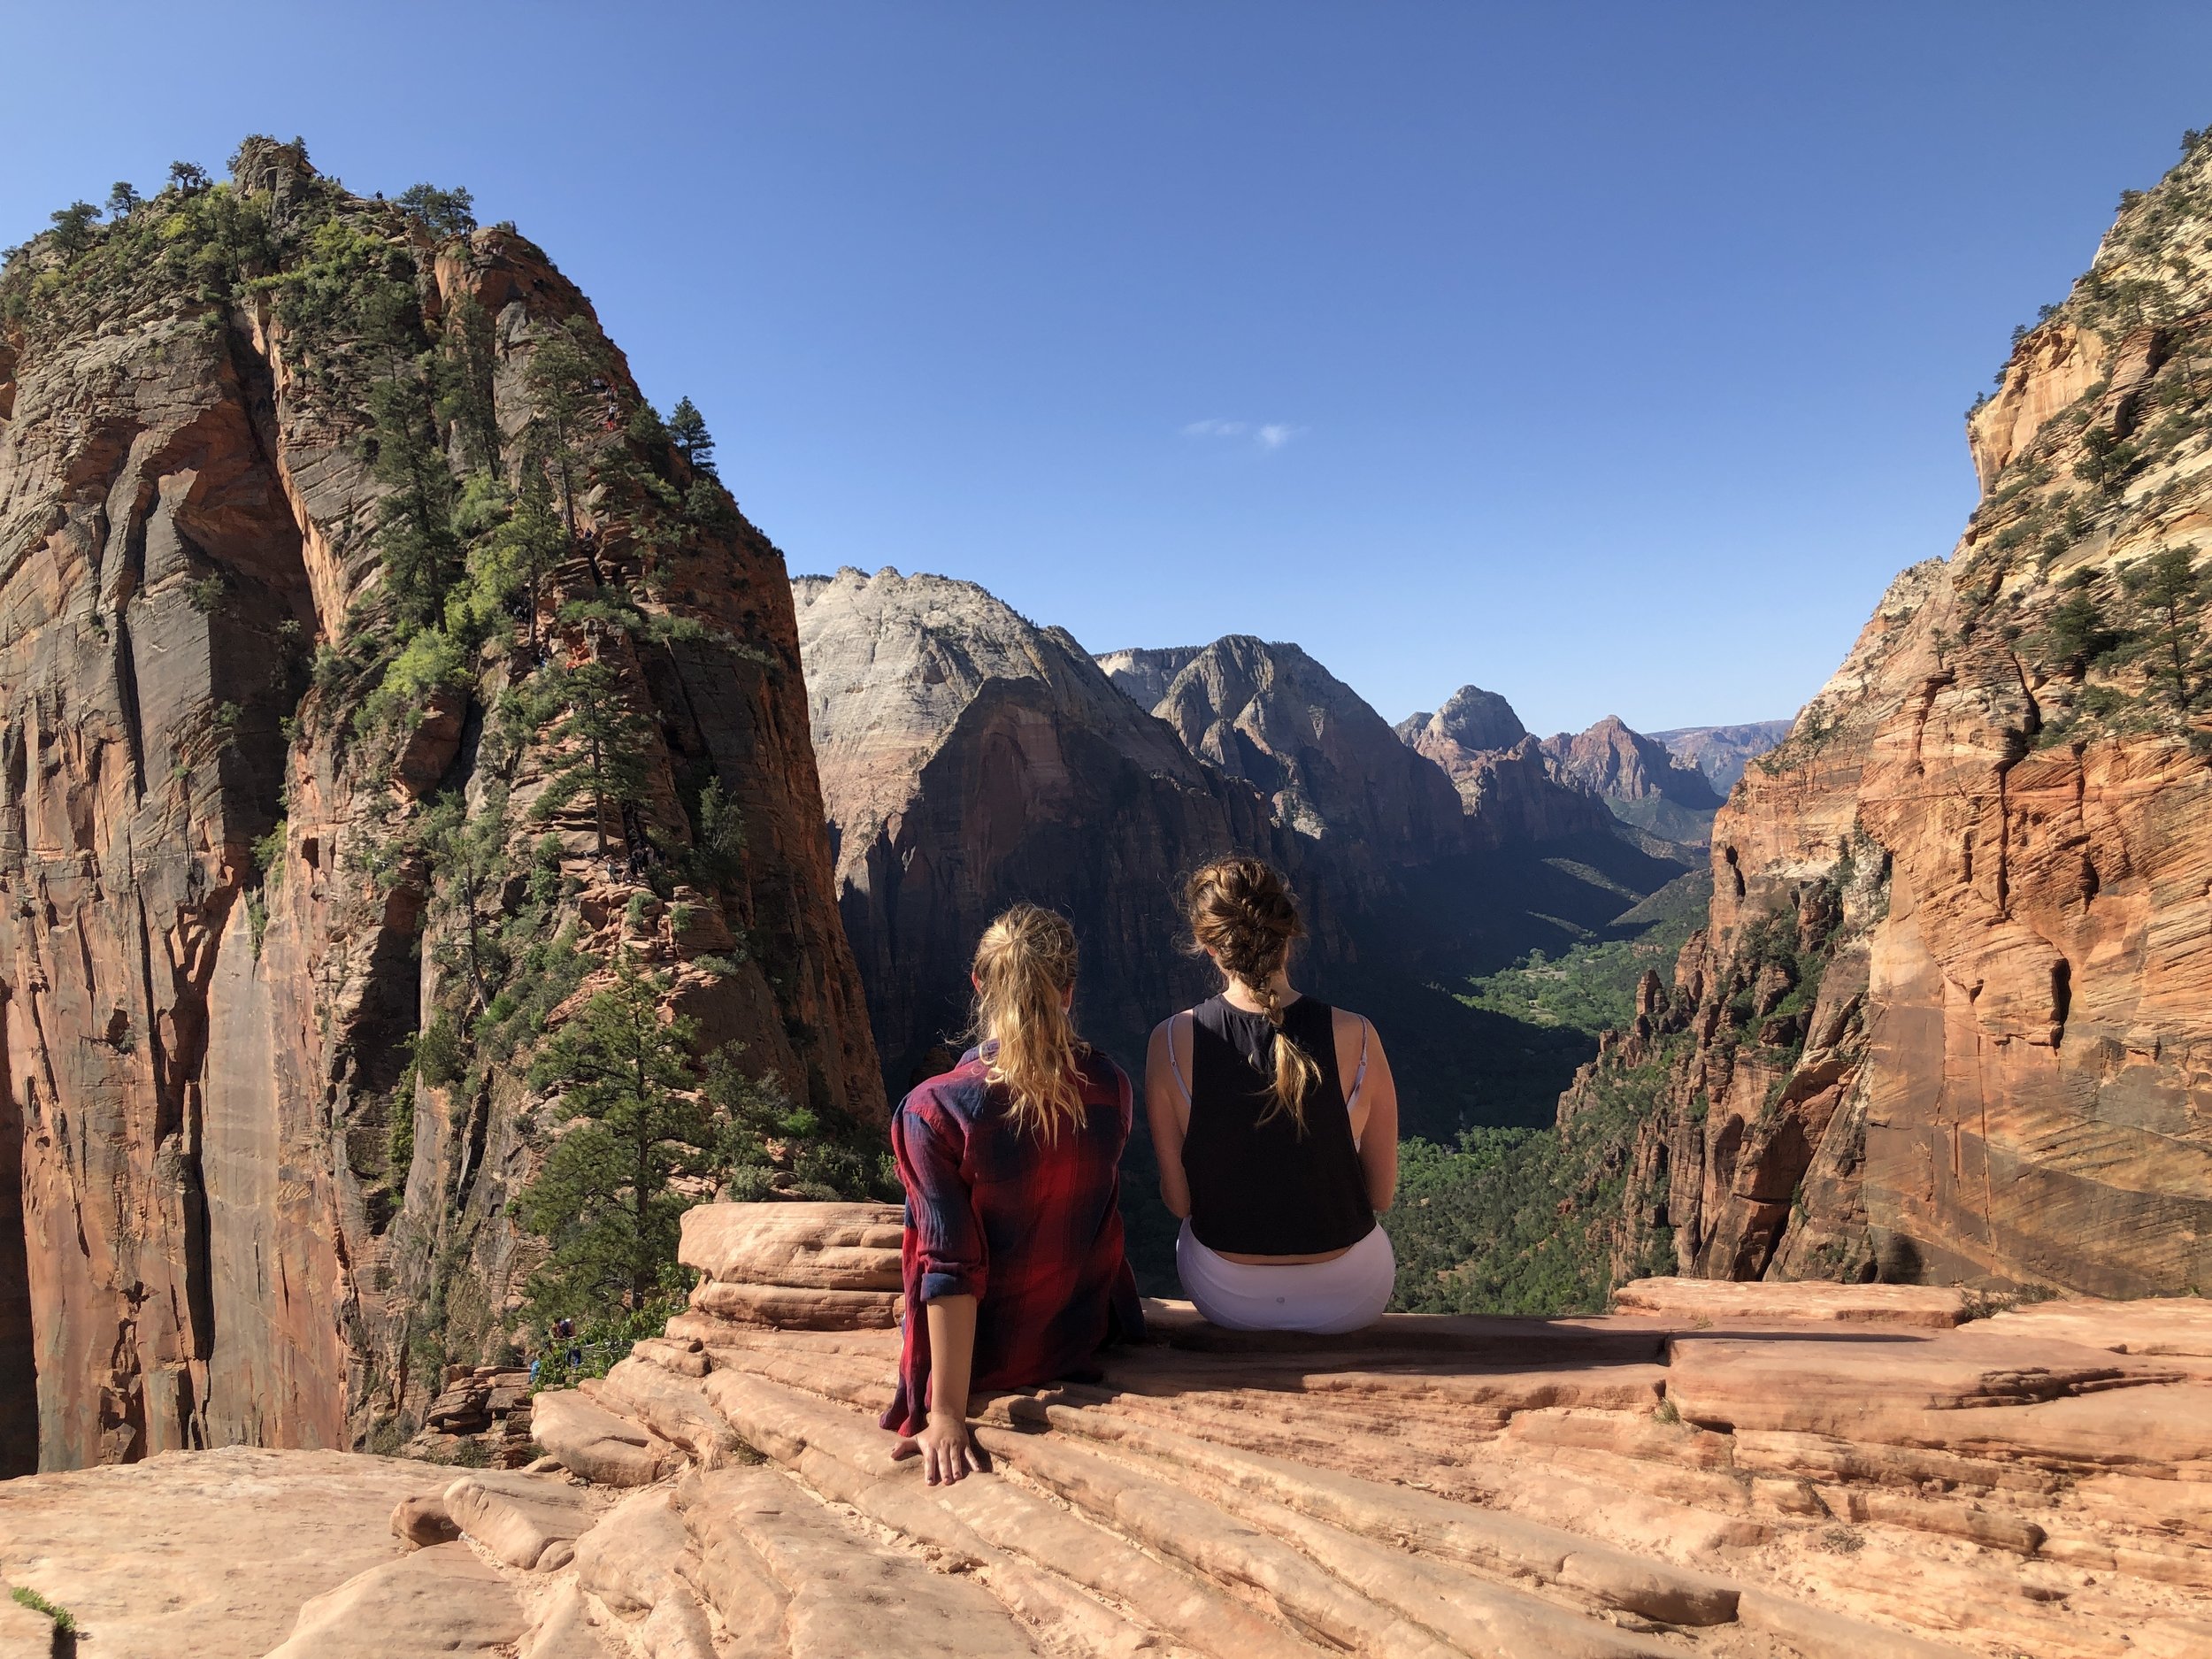
Start EARLY! And I mean be at the trailhead right at sunrise or shortly after. The earlier you go, the less crowded it'll be on the chains (which is the last part to the summit). When the chains are crowded, that is when this hike becomes a bit scary, so I always prefer to do this hike as early as I can to avoid a lot of people. It also means less heat, which make going up the 21 switchbacks in the beginning of the hike less painful.
Wear good hiking boots, ones that have grip. This will help give you extra support on the chains.
Hiking gloves with grip. I've actually never used grip gloves when hiking Angels Landing, but every time I'm on the chains, I wish I had them! Sometimes the chains are really cold (depending on how early you start), sometimes they're really hot (again, depending on when you start), and sometimes your hands just get sore from pulling on them or holding on super tight. Having the grip gloves will just enhance your experience and give you extra traction. I used something similar to these when I did the chains on Half Dome and they would work for this as well. Not a must-have, but something that would be nice to have handy.
When you're on the chains, make sure to use a lot of communication with your fellow hikers, even if they aren't in your group. There's a lot of extremely narrow parts where you may need to hang tight in one spot for a few minutes to let someone coming down/going up safely pass you, so it is important to communicate with others on the chains about who is going to cross first, who is going to let the other pass, etc. Communication is really key on a hike like this!
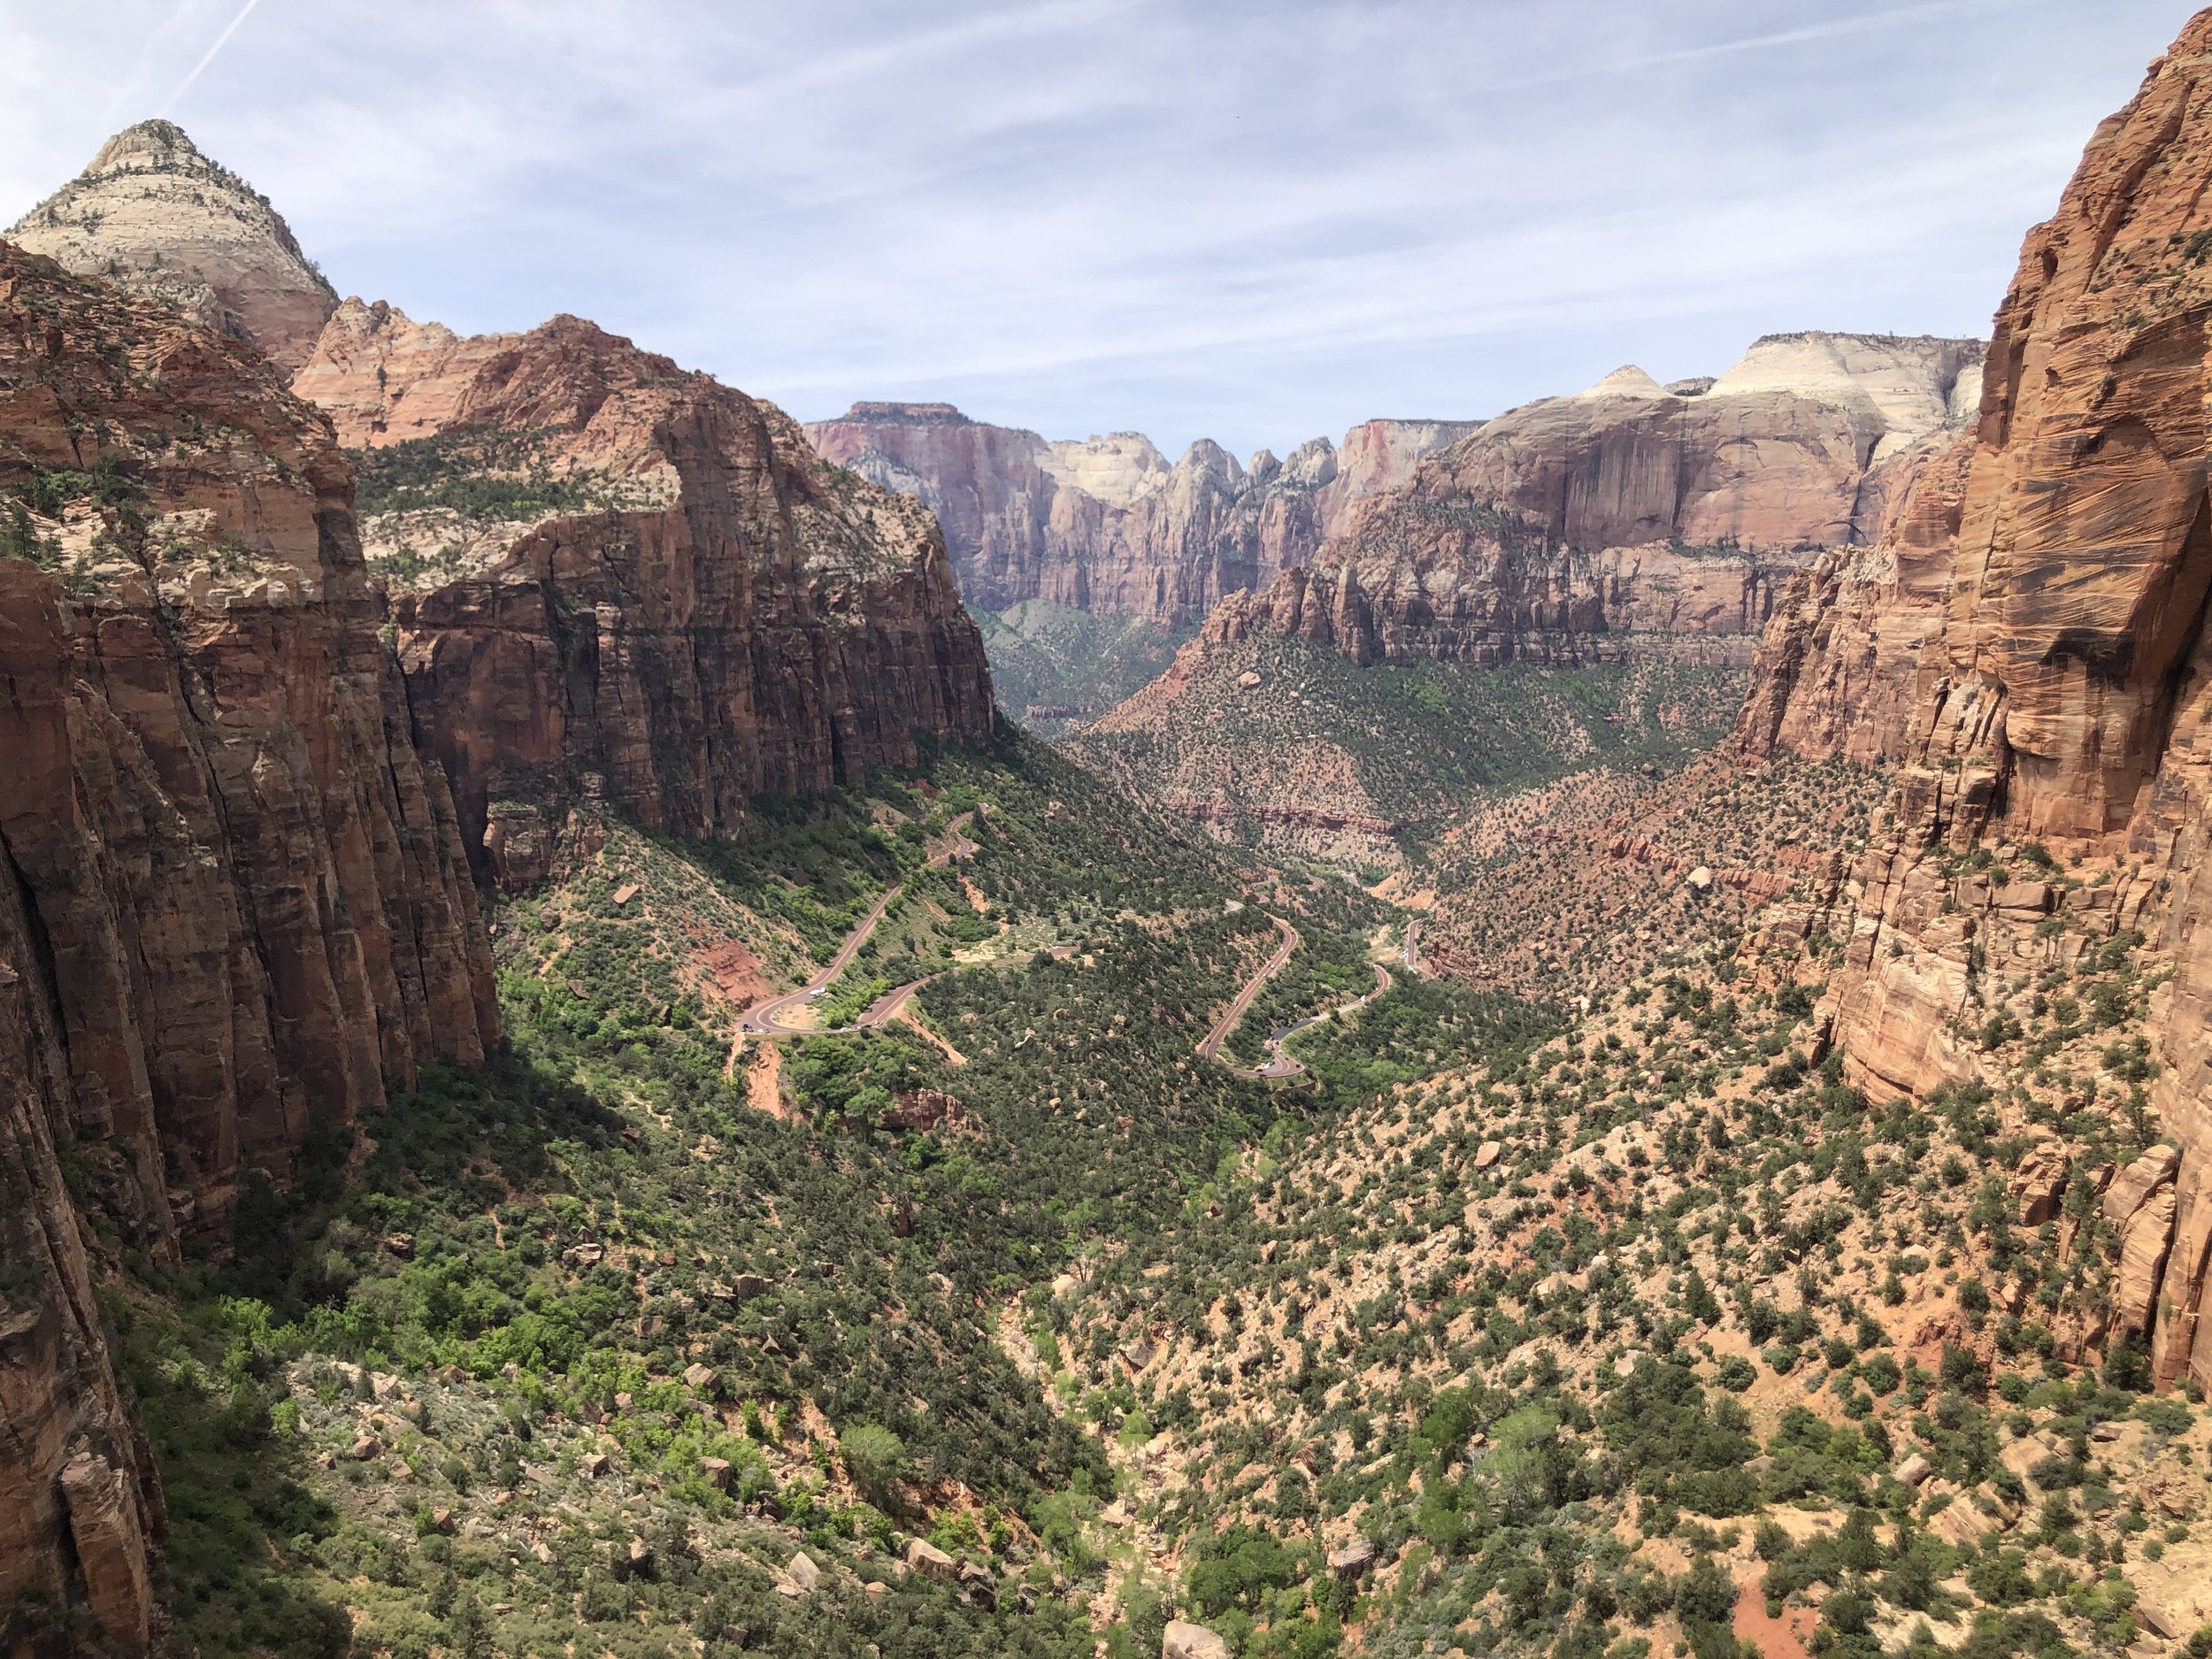
Angels Landing is a 4.3 mile out-and-back hike that is rated difficult and takes around 4 hours to complete. Though it isn't that long, it has over 1,800 feet of elevation gain and then the technical aspect of the chains which bring you to the summit make it more challenging than your typical hike.
IMPORTANT: As of a few years ago, you need a permit to hike Angels Landing. And don't try and hike it without one, because they check right at the trailhead before they let you pass! It'd be best to try and get your permit as soon as you possibly can, but sometimes you can get them just a few days in advanced.
ALSO IMPORTANT: During peak season, private vehicles are not allowed to drive on Zion Canyon Scenic Drive which is the road that brings you to Angels Landing and other popular hikes. Make sure you check the shuttle information prior to your visit to see if you need to take the shuttle (from the South Entrance or from Springdale) or not. I've taken the shuttle a few times and really enjoy it! The lines can be long but, again, if you start early you won't have a problem. Try and get on the first shuttle of the day.
The hike to Angels Landing has two distinct parts:
Early on in the hike you'll reach Walter's Wiggles, which is a set of 21 switchbacks that take their name from Walter Ruesch, Zion National Park’s first superintendent.
The second section is known as the spine and is where the chains start (picture below). This strenuous final section of the hike features steep drop-offs of 800 to 1,000 feet on either side as you ascend 500 feet along a narrow mountain ridge for half a mile to the summit. The chains are anchored support attached along sections of the sheer cliff to assist your way up and down the carved steps.

The spine of Angels Landing
This hike can be scary for some, and it is extremely important to recognize your limits and not attempt the chains if you're afraid of heights, steep drops, or get vertigo easily. It would be a really bad idea to attempt the chains when you know this section of the hike is out of our comfort zone and then start to panic once you're on them. Getting off the chains quickly when you're panicking is NOT easy and can put yourself and your fellow hikers at risk. Know your limits and make an informed decision for yours and others safety.
However, if you are confident enough in your ability to summit, it is 100% worth it and will definitely be one of your favorite hikes ever.
The Narrows Bottom-Up

The Narrows
There are two ways to experience the Narrows: Bottom Up or Top Down. I have only ever done the Bottom Up route which can be done as an out-and-back, and is the more popular route. Doing the Narrows via the Top Down route is a 16-mile journey that requires a permit and usually takes about two or three days to complete.
The Narrows Bottom Up starts at the Riverside Walk, which is the last stop on the Zion Canyon Shuttle. You'll hike upriver for several miles and then turn around and hike back the way you came. The farthest you can go is Big Springs. Beyond this point, a permit is necessary. If you hike to Big Springs, your entire journey will be 10 miles round trip
Along the way, you get to see some of the best scenery in the Narrows, including Wall Street. Wall Street is the iconic section where the canyon gets very narrow and the sheer rock walls close in overhead.
Since this is an out-and-back hike, you can turn around once you have seen enough. For some people, this hike may only be two miles long. For others, it will be 10 miles and take most of the day.
Depending on the season and rainfall, you may hike in water that is so deep it is at your chest (but that is the fun part!). Make sure you check out Zion National Parks website before you head out to see if the Narrows are open. Sometimes they're closed for safety after heavy rain fall.
I recommend renting gear at Zion Outfitters to make your experience that much better. It isn't necessary, but that water is COLD so having the proper equipment is helpful. I've hiked the narrows Bottom Up twice -- once with gear and once without -- and the time with gear was a lot better! I rented the dry-bib package, but they'll make recommendations to you on what to get depending on the time of year. No gear reservation is needed, you can just show up day of and rent what you need.

The Narrows
Observation Point

The summit at Observation Point
Observation Point is one of my favorite hikes in Zion, partly because the views are INCREDIBLE but also because it is somewhat of a hidden gem hike! Typically, people start the hike to Observation Point from within the park on the East Rim Trail from Weeping Rock. However, due to heavy rock fall in 2019, that area has been closed for quite sometime and there isn't information on when it'll reopen. Nowadays, if you want to experience Observation Point, you need to start outside of the park on East Mesa Trail.
The trailhead is located outside the park's east entrance, so you'll have to drive about an hour from the Visitor Center to reach it (but this depends on where you're staying. Refer back to the 'entrances' section of this guide.).
Next, the trailhead is down a section of dirt road with a lot of potholes. The dirt portion can be passable; I've seen low-clearance cars at the parking lot, but even if you're willing to drive your car on it, the bigger problem is that there are only 15 parking spots at the trailhead, and the area surrounding the trailhead is all private with a strict no-parking policy. To avoid this, I highly recommend booking the shuttle with East Zion Adventures, which is a highly-rated company with 4.9 stars! This is what I've done in the past and it is very seamless and affordable. You can park your private vehicle at their office, and their shuttle will take you to the trailhead and pick you up when you're done.
If you do decide to attempt the drive, the address is:
E Mesa Trail, Springdale, UT 84767
This hike isn't technical, and the best part is the stunning views from the summit, which overlook Angels Landing. It is 7-miles roundtrip, has 700-feet of elevation gain, and takes about 3-4 hours to complete.
Zion Canyon Overlook Trail
The Zion Canyon Overlook trail isn't super challenging, at only 1-mile out-and-back and just under 200-feet of elevation gain, but it is a trail I always make a point of doing when I visit Zion. It is a great hike to do for sunrise, or mid-day with a picnic.
At the summit you'll have stunning views of some iconic sites in Zion including The West Temple, Towers of the Virgins, Streaked Wall, and Beehives. The East Temple rises directly above the overlook, towering more than 2,200 ft above the canyon floor. The Great Arch lies recessed into the cliff-face below the overlook.
This trailhead is not a stop on the Zion Shuttle, so you'll need to get to it via your private vehicle. There is a very small parking lot directly across the street that you can park in, or you can find a spot in the overflow lot down the road.
The Subway
The Subway is the most popular backcountry hike in Zion. The Subway is a small slot canyon named for its unique tube-like shape.
There are two ways to hike to the Subway -- from the Top-Down which requires swimming, technical knowledge, and ropes for repelling, or at the Left Fork trailhead going Bottom-Up (which is the way I recommend going and what I linked in the line above).
Starting and ending at the Left Fork Trailhead means this hike is roughly 8.2 miles up the Kolob Terrace Road. This route is non-technical and gives you views to many of the canyon's beautiful cascades and waterfalls as well as the famous lower Subway formations. The complete hike may take anywhere between 5 to 9 hours and is a full day so make sure to be prepared. Though this route doesn't require any technical gear, it is rated strenuous.
You will need a permit to do this hike (regardless of it you do it Top-Bottom or Bottom-Up). You can find more information about applying for one here.

The Subway
What To Explore Outside Zion
Sand Hollow State Park
Sand Hollow State Park is an amazing place to spend a few hours if your trip allows for it. The warm, blue water up against the contrasting bright red sandstone make for a perfect backdrop, and an awesome spot to spend a summer afternoon. You can swim or boat here, but I recommend bringing a paddle board or kayak if you have one and getting deep out in the water to really enjoy the views.
Depending on what time of year you visit, it may be crowded as this is a popular spot among Utah locals, but there is plenty of parking alongside the water so finding a spot shouldn't be a problem.
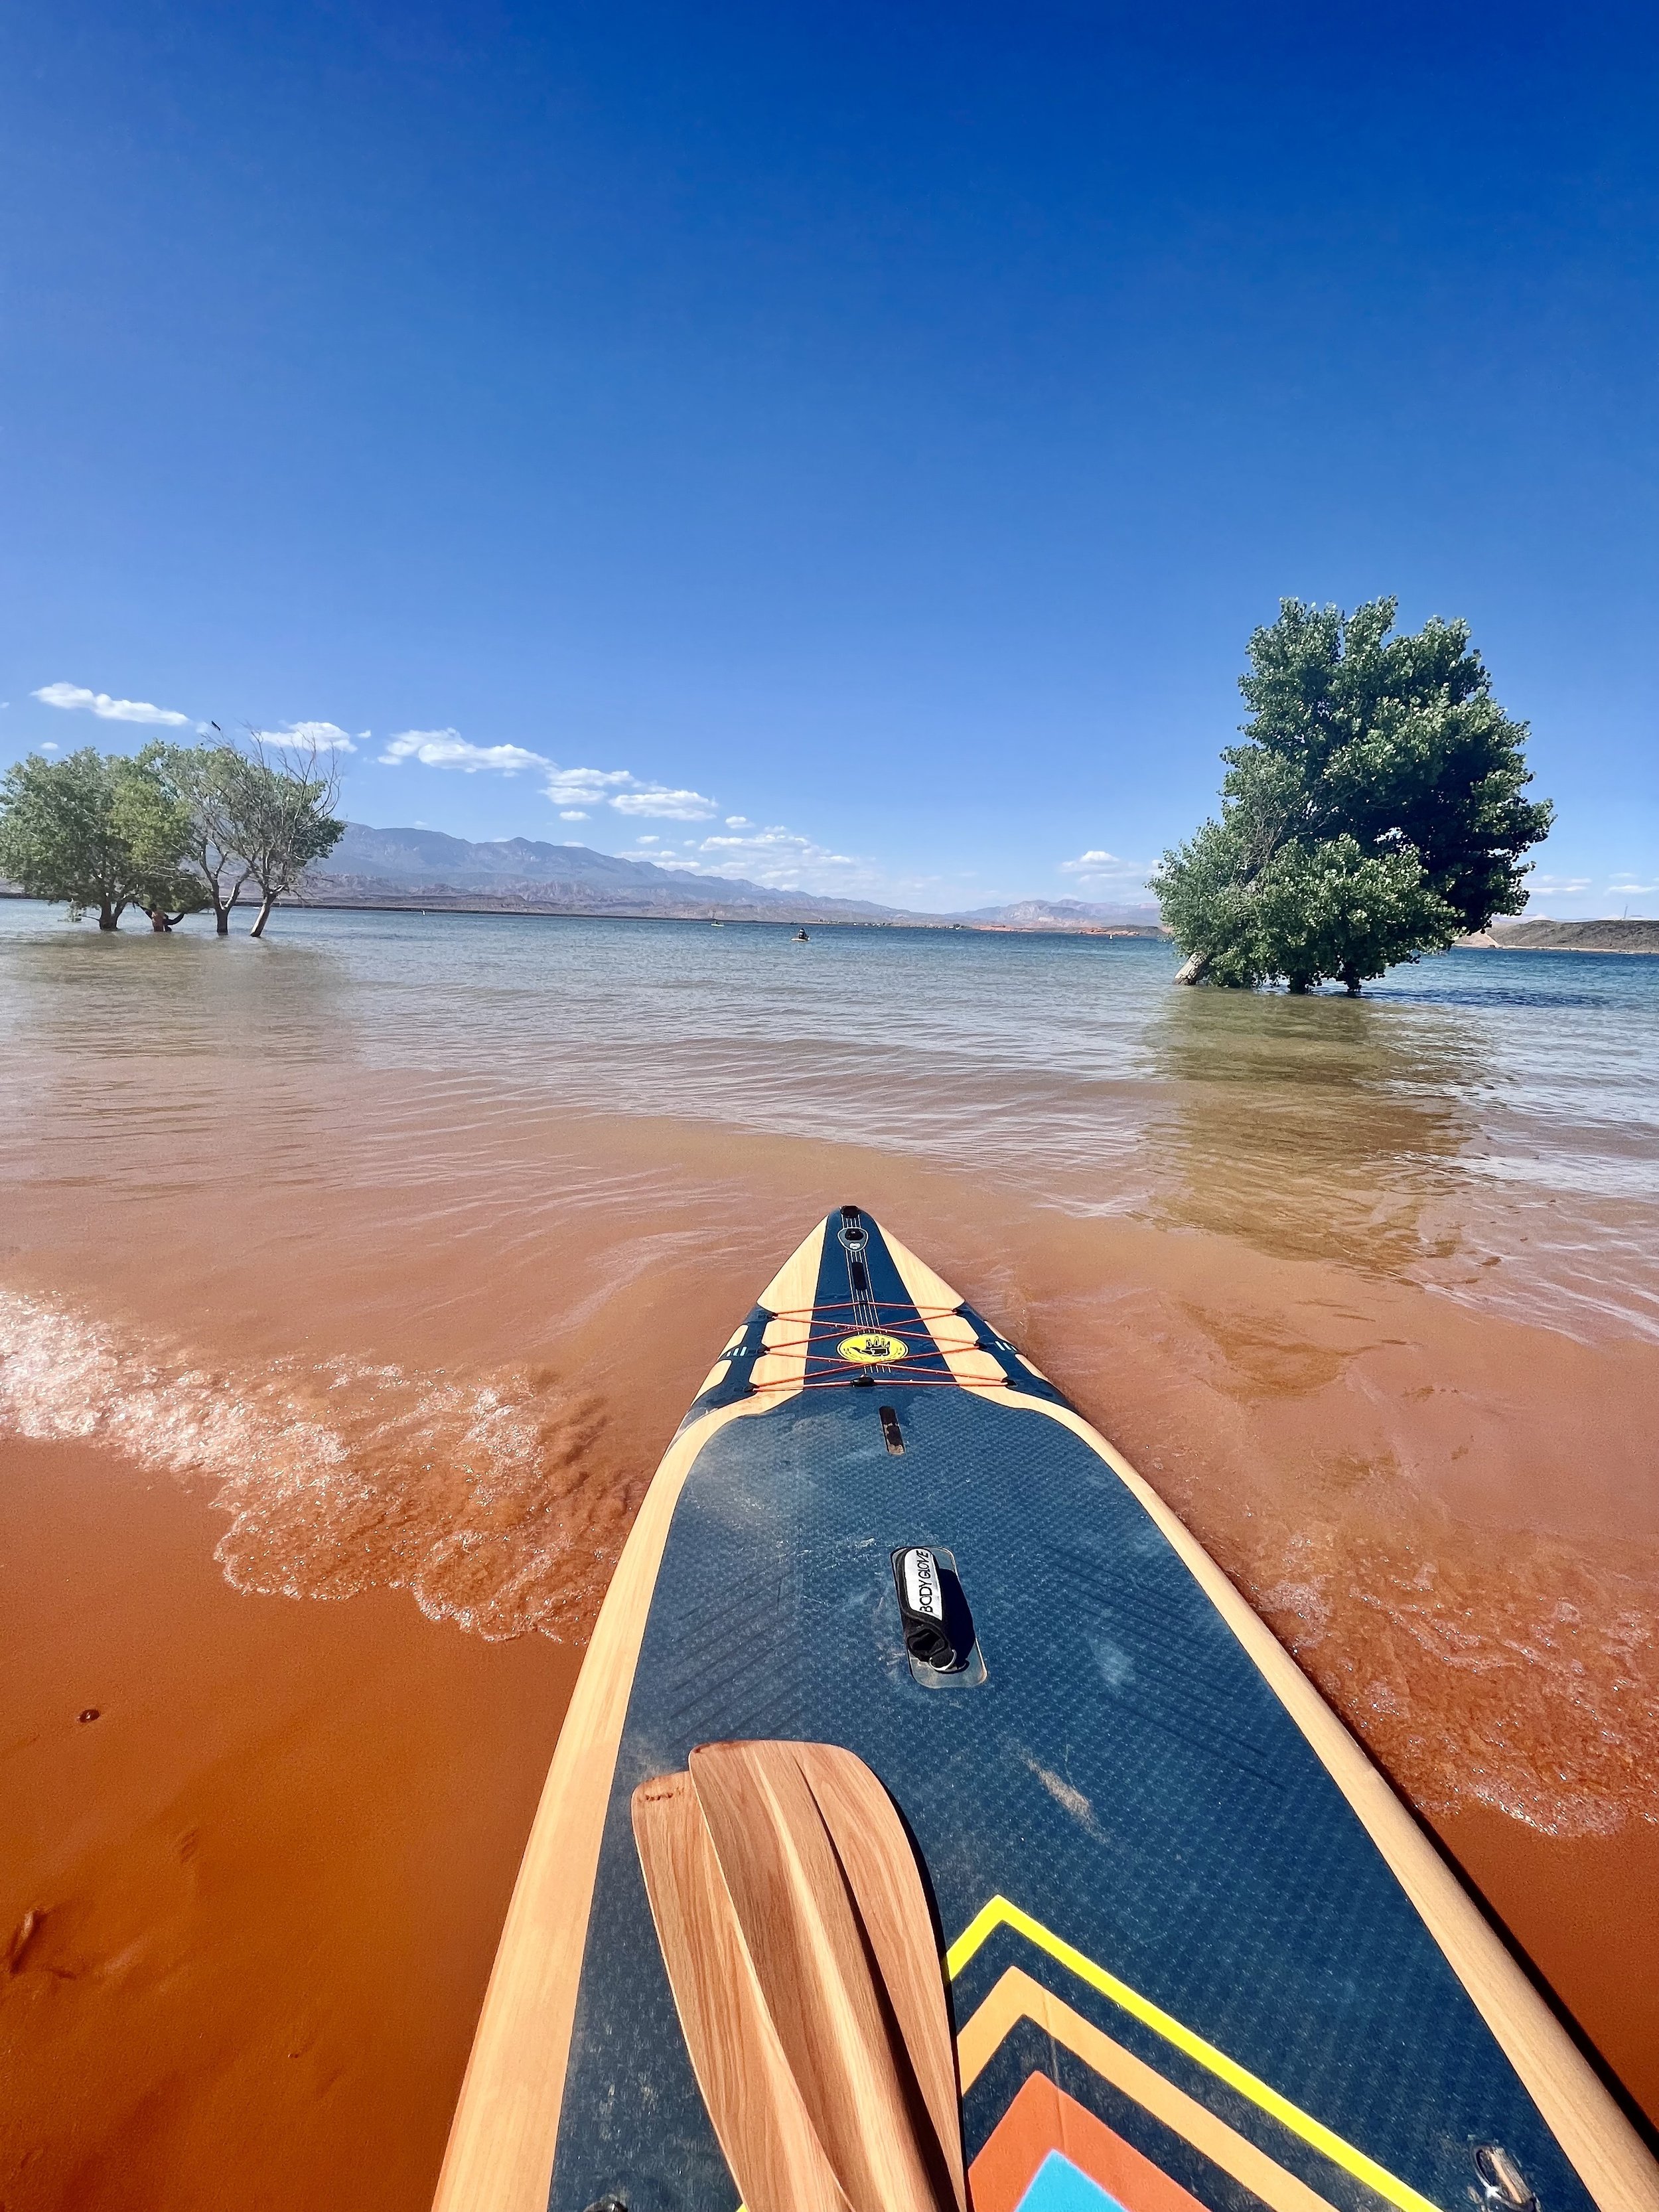
SUP at Sand Hallow State Park

SUP at Sand Hallow State Park
Quail Creek State Park
Quail Creek is another favorite spot among the locals, and a great place that lures swimmers and boaters year-round. It is also located less than 10-miles away from Sand Hallow, so if you get there too late in the day and they stop letting vehicles inside the park due to crowds, I recommend bopping over to Quail Creek. I did this the summer of 2022 when Sand Hallow was filled up and had no issue getting into Quail Creek.
Quail Creek also has amazing blue water surrounded by bright red sandstone, so you'll be rewarded with similar views. Again, if you have a kayak or SUP, bring it!

Quail Creek State Park
Coral Pink Sand Dunes State Park
The sand dunes at Coral Pink Sand Dunes State Park were formed by the erosion of the nearby Navajo sandstone cliffs and are estimated to be 10,000 to 15,000 years old! The state park was first opened to the public in 1963 and has long been a spot for locals to come play.
People mainly come here for off-roading, but you can also rent sand boards and sand sleds onsite! There are also ATV tours.

Coral Pink Sand Dunes State Park